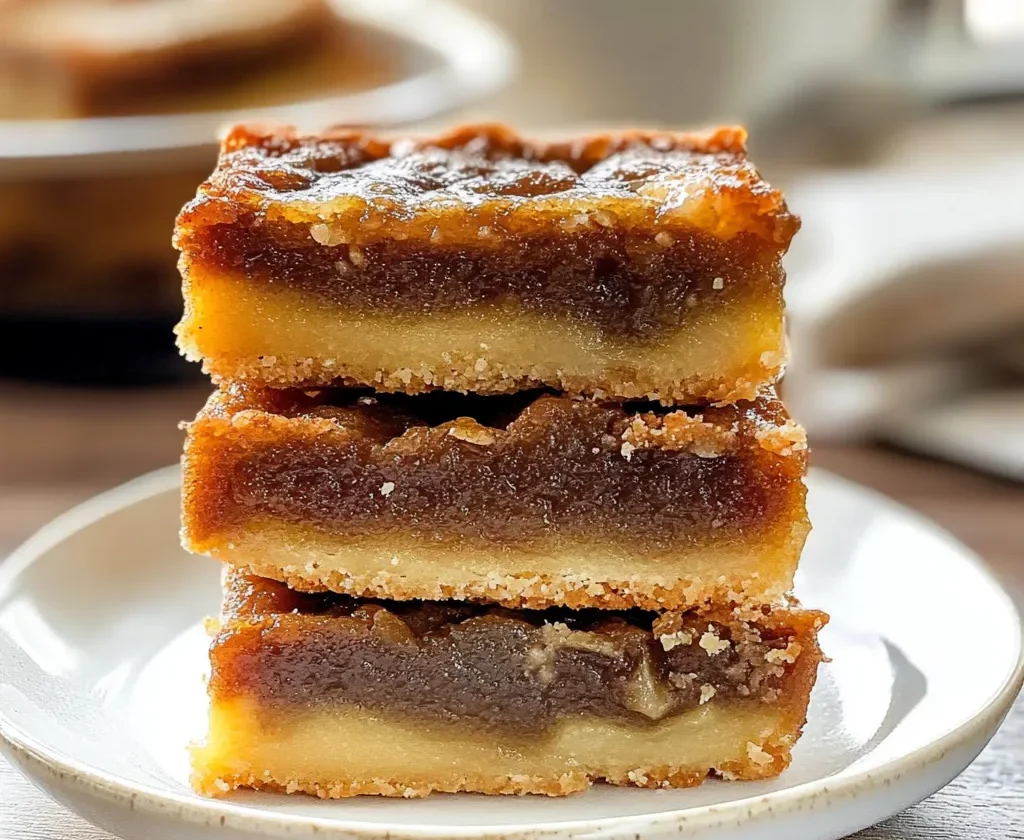
Few desserts capture the heart of Canadian baking quite like the Butter Tart—a gooey, golden treat that perfectly balances rich sweetness and buttery comfort. But as any baker knows, making individual tarts can be time-consuming. That’s where Butter Tart Squares come in—an easier, equally irresistible version of the iconic dessert that delivers all the flavor with half the fuss.
These squares combine a buttery shortbread base with a luscious, caramel-like filling that’s sweet, slightly tangy, and studded with chewy raisins or crunchy walnuts (or both!). Each bite melts in your mouth—rich, smooth, and utterly nostalgic. Perfect for holidays, potlucks, or cozy weekends, these bars slice beautifully and keep well, making them a baker’s dream.
Whether you’ve grown up with butter tarts or are discovering them for the first time, this recipe offers an approachable way to enjoy a true Canadian treasure in every square. Let’s dive into how to make these irresistible bars that are as easy as they are indulgent.
Recipe Overview
Butter Tart Squares are a simplified twist on classic butter tarts—featuring a tender, buttery shortbread crust topped with a rich, gooey brown sugar filling. They’re sweet, slightly tangy (thanks to a splash of vinegar), and customizable with raisins, currants, or chopped walnuts. The result? A chewy, caramelized, melt-in-your-mouth dessert that tastes like home and nostalgia in every bite.
Ingredients & Instructions
Ingredients
Base Layer
- 1 cup unsalted butter, softened
- ½ cup powdered sugar
- 2¼ cups all-purpose flour
Butter Tart Filling
- ½ cup unsalted butter, softened
- 1 cup light or dark brown sugar
- 2 tablespoons all-purpose flour
- 4 large eggs
- 2 teaspoons vanilla extract
- ¾ cup dark corn syrup
- 2 tablespoons white vinegar
- 1 cup raisins, currants, or chopped walnuts (optional, or use a mix of ½ cup currants and ½ cup chopped walnuts)
Instructions
1. Prepare the Pan and Preheat the Oven
Preheat your oven to 350°F (175°C). Line a 9×13-inch baking pan with parchment paper, leaving some overhang on the sides. This will make lifting and slicing much easier later on.
2. Make the Base Layer
In a large bowl, cream together butter and powdered sugar until light and fluffy. Add the flour, mixing until a soft, crumbly dough forms. The mixture will look like thick, buttery sand—this is exactly what you want for a melt-in-your-mouth crust.
Press the dough evenly into the prepared pan, smoothing it into an even layer. Bake for 15–20 minutes, until the top looks set and the edges are just beginning to turn pale golden. Do not overbake—the crust should remain tender. Leave the oven on for the next step.
3. Prepare the Butter Tart Filling
While the crust bakes, prepare the filling. In another large bowl, beat together butter, brown sugar, and flour until combined. This forms the base of the rich filling.
Next, add the eggs and vanilla extract, whisking until smooth and glossy. Stir in the corn syrup and vinegar—these ingredients are key to achieving that signature sweet-yet-tangy butter tart flavor.
If you’re including raisins, currants, or walnuts, fold them in at this stage. They’ll add a pleasant texture contrast to the gooey filling.
4. Assemble and Bake
Once the crust comes out of the oven, pour the filling mixture evenly over the warm base. The heat will help the layers meld together for the perfect bite.
Return the pan to the oven and bake for 30–35 minutes, or until the top is golden and set. Gently nudge the pan—if the filling no longer jiggles like liquid, it’s ready.
5. Cool and Slice
Remove from the oven and cool completely on a wire rack. The filling will firm up as it cools, becoming easier to slice.
Once cooled, lift the slab from the pan using the parchment overhang. Place it on a cutting board and use a sharp knife to slice into neat squares or bars. Wipe the knife between cuts for clean edges.
Cooking Tips & Variations
1. Perfect Crust Every Time
- Be sure to soften your butter, not melt it. This ensures a tender, crumbly crust rather than a greasy one.
- For extra flavor, try replacing ¼ cup of flour with finely ground pecans or almonds in the base.
2. Customize the Filling
- Raisins: For a chewy, classic texture.
- Currants: Add a subtle tartness that balances the sweetness.
- Walnuts or pecans: For crunch and a slightly nutty flavor.
- No add-ins: Keep it smooth and gooey for the purest butter tart experience.
3. Make It Extra Decadent
Drizzle the cooled bars with caramel sauce or dust with powdered sugar for an elegant finish.
4. Gluten-Free Option
Swap the flour in both the base and filling with a 1:1 gluten-free flour blend—the results are just as delicious.
5. Storage Tip
Let the bars cool completely before cutting or storing to prevent the filling from sticking.
Storage & Serving Suggestions
Storage
- Room Temperature: Store in an airtight container for up to 3 days.
- Refrigerator: Keep refrigerated for up to 1 week for maximum freshness.
- Freezer: These freeze beautifully! Wrap each square tightly in plastic wrap and place in a freezer-safe bag. Freeze for up to 3 months, then thaw at room temperature before serving.
Serving Ideas
- Enjoy warm or at room temperature with coffee or tea.
- For a decadent treat, serve slightly warmed with a scoop of vanilla ice cream or a dollop of whipped cream.
- Add to holiday cookie platters or serve as part of a dessert buffet—they’re always the first to disappear!
Butter Tart Squares are everything you love about traditional butter tarts—gooey, buttery, and perfectly sweet—without the hassle of rolling pastry or forming shells. The combination of the tender shortbread crust and rich, caramelized filling makes these bars a true crowd-pleaser.
Whether you’re making them for a holiday gathering, bake sale, or just to satisfy a sweet craving, these squares deliver comfort and nostalgia in every bite. Simple, elegant, and undeniably Canadian, they’re the kind of dessert that disappears fast and leaves everyone asking for the recipe.
So, grab your baking pan, preheat your oven, and treat yourself to this classic delight—you deserve it.
FAQs
1. Can I make Butter Tart Squares ahead of time?
Yes! These bars are perfect for make-ahead baking. Store them in an airtight container at room temperature or in the fridge for several days—they taste even better the next day.
2. Can I use light corn syrup instead of dark?
You can, but dark corn syrup gives that deep caramel flavor that defines butter tarts. Light syrup makes the filling slightly sweeter and paler.
3. Why add vinegar to the filling?
Vinegar cuts the sweetness and balances the buttery richness, keeping the filling from being overly sugary.
4. What’s the best way to cut neat squares?
Cool completely, use a sharp knife, and wipe it clean between cuts. For extra precision, chill the bars before slicing.
5. Can I freeze Butter Tart Squares?
Absolutely! Wrap and freeze for up to 3 months. They thaw beautifully and taste freshly baked when warmed slightly.
Butter Tart Squares combine a buttery shortbread crust with a gooey, caramel-like filling. Easy to make, irresistibly rich, and the perfect Canadian dessert bars!